progress at last
progress at last
My carawagon roof restoration is starting to come together.
It has just passed another MOT thanks to my OH rebuilding the front swivel and new servo. I need to sort out the bendy roof section next, dirt and flaking paint on the outside, damaged flock on the inside where the windows have leaked.
The main aluminium roof section is all painted, next job with that is to start drilling holes in the new hinges to match the pre-drilled aluminium angle.
Fit wooden fillets (all painted) where the wooden roof rack would have gone (I have a galvanised roof rack which I will only fit when I need it) It has a skylight fitted from new, the two sisters who first bought the carawagon were keen bird watchers so they had a perspex window fitted. The two sections that support the aluminium sheet when it is down are also ready to fit. Just need a day when it is not too cold outside for the sealant to go off and my fingers not to freeze.
Regards Christine
- RMS
- Posts: 2236
- Joined: Wed Feb 15, 2012 12:02 am
- Location: Near Wakefield, UK, in God's own Country!
Re: progress at last
Looking good Christine - hope you get it finished in time for this year's round of events 
I found the most accurate way to do the holes in the hinge was to drill an end one and use a small nut & bolt to bolt it to the roof section.
Then drill one a couple of foot along using the existing hole as a guide and fit another nut/bolt and so on to the other end, then once it is firmly fixed, go back and drill the rest.
I suppose you could use clamps/mole grips to hold the hinge in place and drill, but just keep on going back to check the hinge hasn't moved.
Have fun - I've still got another two roofs to replace on my projects - got all the wood cut and the seals. Like you, just waiting for some warmer weather to get them done
Cheers,
Robin.
1967 109" Carawagon 200TDi
1972 109" SW Carawagon 2.5NA
1958 109" Carawagon 2.25P (project)
1972 109" Carawagon 200 or 300TDi (project)
1974 Dormobile 2.25D (project)
(Robin on S2C forum)
1972 109" SW Carawagon 2.5NA
1958 109" Carawagon 2.25P (project)
1972 109" Carawagon 200 or 300TDi (project)
1974 Dormobile 2.25D (project)
(Robin on S2C forum)
Re: progress at last
Thanks Robin,
Do you have a preferred way to assemble? I am guessing make sure that the aluminium sheet sits flat when down that way there is some adjustment on the height of the curved end sections. I was going to make sure it all works before I put all the screws and rivets in, as you say a few small bolts to hold the hinges in place while drilling that way nothing can move.
Once I have finished this one I can start again as I accidentally bought a carawagon back body (missing the cupboards below the narrow window). All the woodwork needs replacing and so does the bendy aluminium section, It has been interesting comparing the 2 as my carawagon is 1975 whereas the 'bitsa' is approx. 1968. The seals used on each are different, the older roof aperture is also 3 or 4" narrower.
All good fun,
Regards Christine
- RMS
- Posts: 2236
- Joined: Wed Feb 15, 2012 12:02 am
- Location: Near Wakefield, UK, in God's own Country!
Re: progress at last
Hi Christine,
Well, as you've probably guessed, it's best as a two person job, with a possible third helper to lift the bendy section up!
I fit the wooden sides to the bendy section first, on the ground, and the wooden hinge supports underneath at each end, with the brass hinges fitted.
Then fit the end pieces, with middle hinges, to the main roof using half a dozen screws across the bottom hinge and keep them vertical by clamping some 2x1 timber vertically (with windows removed) across the central hinge to stop them folding, and then clamp the end sections to the wooden curved roof supports, with packing pieces in between to keep them vertical - sounds complicated but if you try it you'll see what I mean, I hope
Next, with someone standing in the vehicle, we slide the bendy section up so it lays over the end sections.
You might want to use 2/3 lengths of planed timber to slide the bendy section up on.
You then need someone outside with some strength and stamina! on a stepladder to pull down one of the wooden sides and push it down and in towards the hinge so you can fit a few screws. Make sure you fit several at each end before your helper releases the pressure as there's a lot of strain on the ends on the hinges!
Once you have say 15-20 screws in the side, it's time to see how accurate your measurements were!
Get your helper to try to pull down the other side - it's hard work to get it really tight - to see how it fits.
You probably won't get it all the way down, but it should give you an idea if something's not right.
As the roof is under a fair bit of tension at the ends, caused by the end panels, I usually then lower the end panels and use a length of timber, around 5'6" long or so, vertically in the centre to hold the roof up, with a length of 4"x1" or so horizontally between the vertical timber and the roof.
That makes it fairly easy then for your helper to push the other side down to the hinge for you to fit some screws, again about 20 or so with most at the ends.
Then, carefully try to lift and unfold one end panel.
If all goes well, and your measurements were exact, the end panel should be a tight fit.
However, each one I've done needed adjustment!
If you can't get the end panel vertical, you need to remove it, take the centre hinge out and cut/plane the top of the bottom section and the bottom of the top section equally.
If those two sections aren't exactly equal, from the pivot point of the top hinge to the pivot of the centre hinge to the pivot of the bottom hinge, the end panels won't fold properly when it's all together!
If the end panel is too loose, you have a couple of choices.
Either take out the side panel screws at the end, get your helper to pull/push the side down a bit more and refit the screws a little higher up the side panel.
Or, take out the end panel, remove the centre hinge and fit some gasket material (strip of rubber seal?) above and below the hinge.
There are other ways to adjust, but they are probably the most straightforward
Then I would fit a couple of screws in the end panel to roof hinges at each end and see how it folds.
Hopefully it will fold flat, so then it's just a matter of lifting it again and screw in the rest of the screws
Anyway, that's my experience from doing three of them - I'm sure others might want to add tips or suggest other ways they might have done theirs.
Cheers,
Robin.
1967 109" Carawagon 200TDi
1972 109" SW Carawagon 2.5NA
1958 109" Carawagon 2.25P (project)
1972 109" Carawagon 200 or 300TDi (project)
1974 Dormobile 2.25D (project)
(Robin on S2C forum)
1972 109" SW Carawagon 2.5NA
1958 109" Carawagon 2.25P (project)
1972 109" Carawagon 200 or 300TDi (project)
1974 Dormobile 2.25D (project)
(Robin on S2C forum)
Re: progress at last
Hi Robin,
Thankyou for that, when I was taking it apart I thought this will be interesting putting it all back together.
I am impressed that you have rebuilt 3, do you have the largest collection of carawagons? I really like the way they are designed and put together, so simple, I did notice that to buy the hinges and new seals costs more today than the whole roof cost new back in the day (£225.00)
Regards Christine
- RMS
- Posts: 2236
- Joined: Wed Feb 15, 2012 12:02 am
- Location: Near Wakefield, UK, in God's own Country!
Re: progress at last
Hi Christine,
We already had Patrick's Station Wagon Carawagon
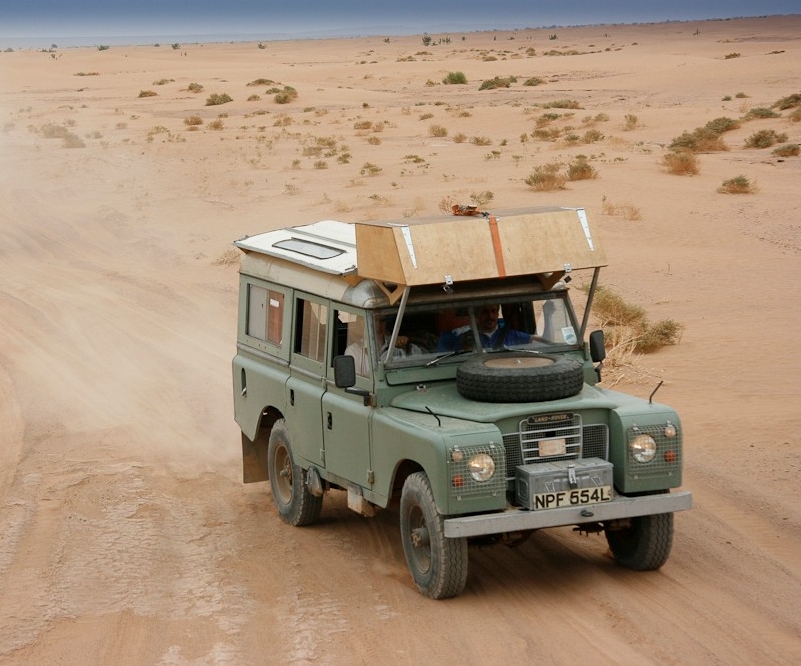
which we restored for a Morocco trip, then I got my first one (the one I'm using now) shortly after that.

That one I restored in just 3 weeks as Patrick was going on holiday with his and I needed one for our first show stand at Driffield! So that meant swapping the engine for a 200TDi, replacing the roof woodwork and seals, and painting some panels - finished painting some weeks later.
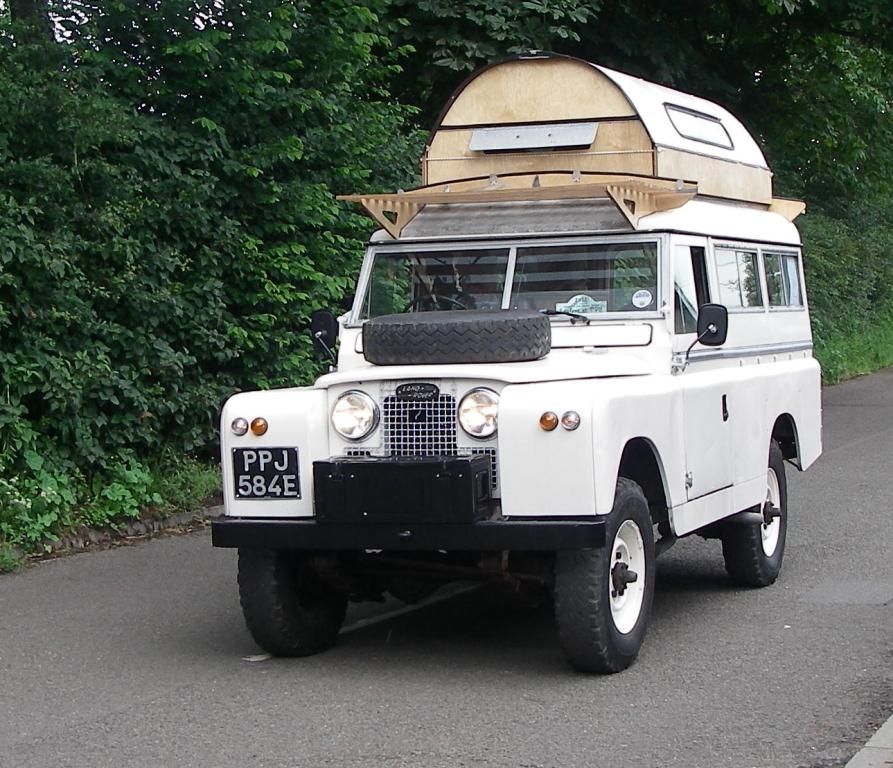
Two others came up on ebay - there were no bids on them after a few days so I approached the sellers with offers which they accepted
One is a complete Carawagon body, lifted off a dead chassis but all complete. I went all the way to Truro for that one, with a trailer I made from scaffold poles just for that trip!
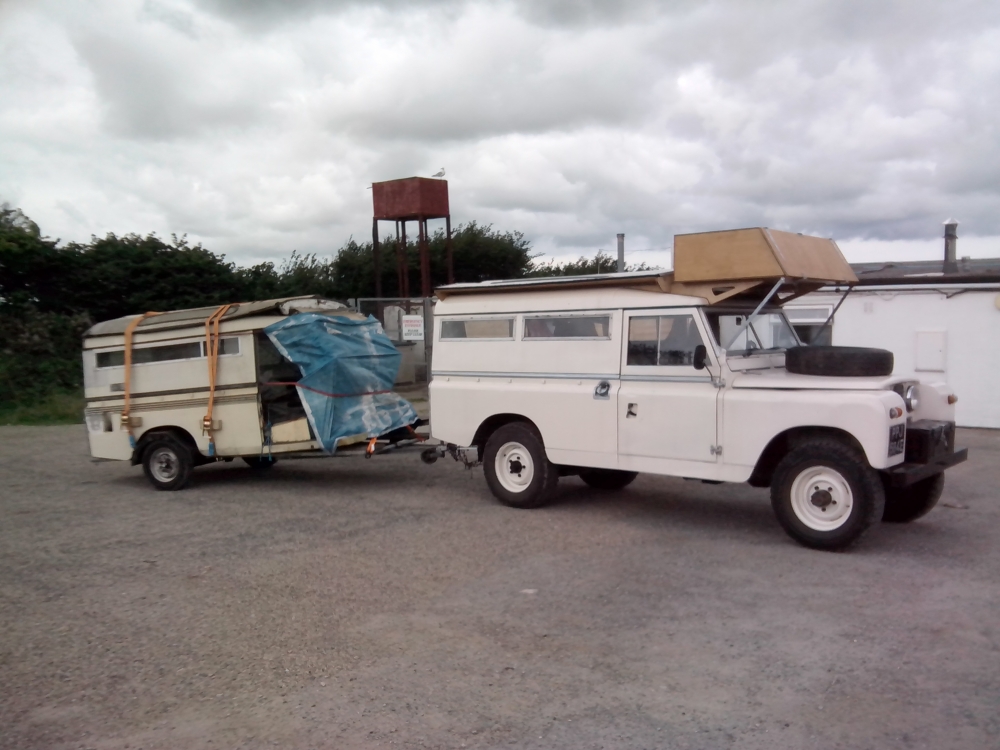
I also bought a 1958 LWB project for that body to drop on to, though that also needs a new chassis (galv chassis waiting in my garage).
The other is a 1971 S3 with an unusual bed arrangement; 2 singles or a double across the whole width of the vehicle.
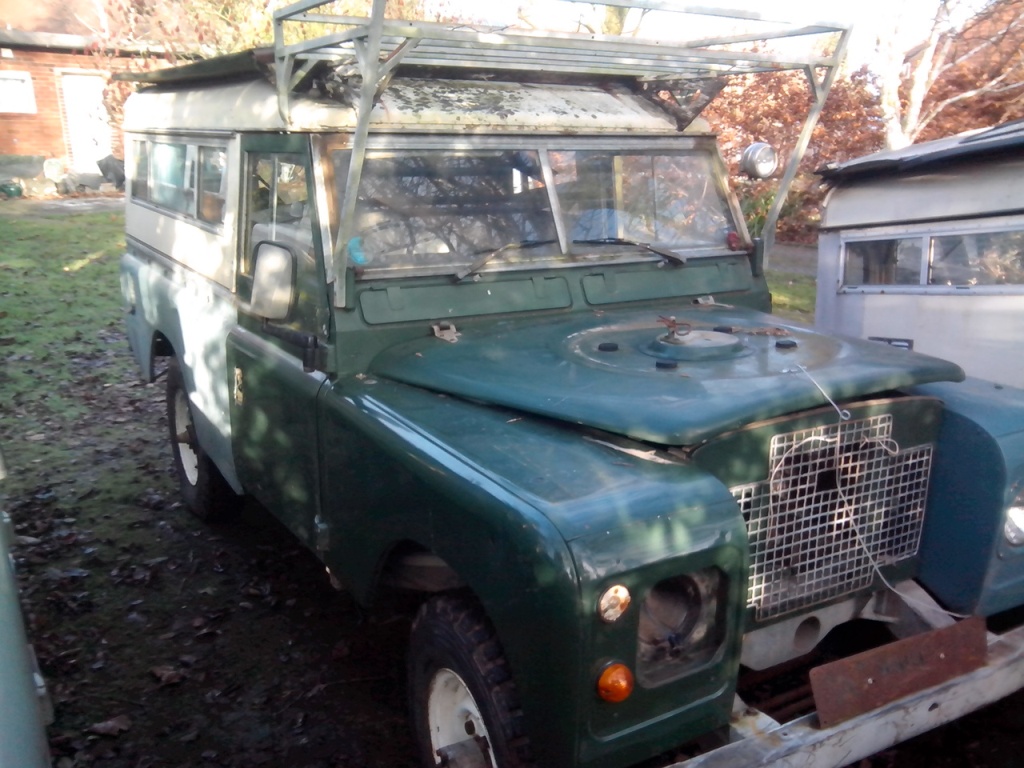
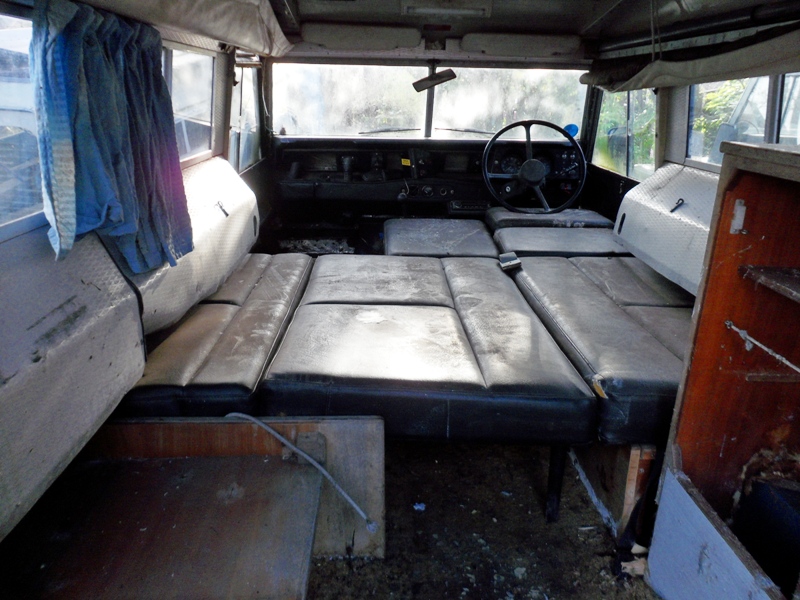
That came on a galvanised chassis about 5 years old, but no engine or gearbox and nothing bolted together!
Luckily we have plenty of room to store the projects
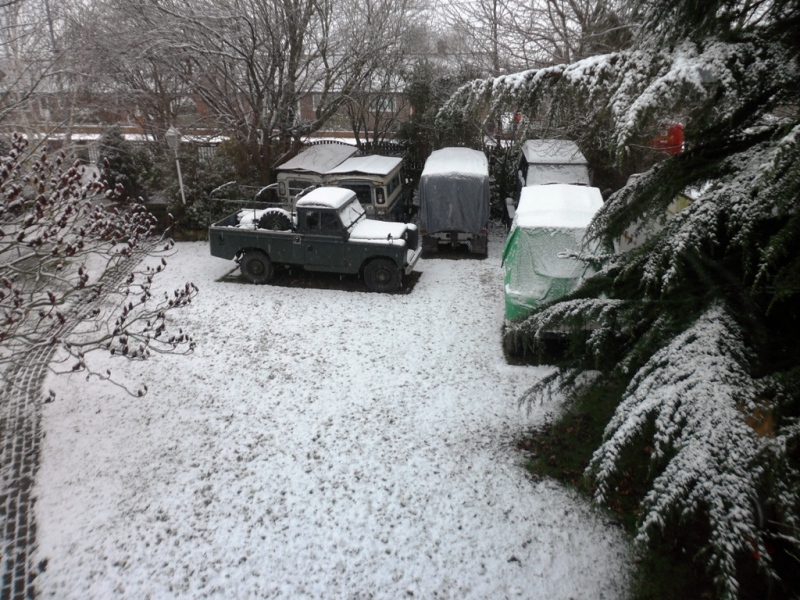
My intention is to restore the two projects, then sell one of the 'standard' Carawagons, leaving us with Patrick's SW Carawagon, the one with the double bed and one 'standard' one (1958 so MOT exempt ) so all different
As well as the two Carawagons we are using now, I also replaced the woodwork and seals on the Carawagon of WhiteKnight on here, so have had a bit of experience, and just another two to do now!
Cheers,
Robin.
We already had Patrick's Station Wagon Carawagon

which we restored for a Morocco trip, then I got my first one (the one I'm using now) shortly after that.

That one I restored in just 3 weeks as Patrick was going on holiday with his and I needed one for our first show stand at Driffield! So that meant swapping the engine for a 200TDi, replacing the roof woodwork and seals, and painting some panels - finished painting some weeks later.

Two others came up on ebay - there were no bids on them after a few days so I approached the sellers with offers which they accepted
One is a complete Carawagon body, lifted off a dead chassis but all complete. I went all the way to Truro for that one, with a trailer I made from scaffold poles just for that trip!

I also bought a 1958 LWB project for that body to drop on to, though that also needs a new chassis (galv chassis waiting in my garage).
The other is a 1971 S3 with an unusual bed arrangement; 2 singles or a double across the whole width of the vehicle.


That came on a galvanised chassis about 5 years old, but no engine or gearbox and nothing bolted together!
Luckily we have plenty of room to store the projects

My intention is to restore the two projects, then sell one of the 'standard' Carawagons, leaving us with Patrick's SW Carawagon, the one with the double bed and one 'standard' one (1958 so MOT exempt
As well as the two Carawagons we are using now, I also replaced the woodwork and seals on the Carawagon of WhiteKnight on here, so have had a bit of experience, and just another two to do now!
Cheers,
Robin.
1967 109" Carawagon 200TDi
1972 109" SW Carawagon 2.5NA
1958 109" Carawagon 2.25P (project)
1972 109" Carawagon 200 or 300TDi (project)
1974 Dormobile 2.25D (project)
(Robin on S2C forum)
1972 109" SW Carawagon 2.5NA
1958 109" Carawagon 2.25P (project)
1972 109" Carawagon 200 or 300TDi (project)
1974 Dormobile 2.25D (project)
(Robin on S2C forum)
Re: progress at last
The two singles is pushing it slightly, I'll be using the bulkhead as a pillow on mine! It looks to be the same layout as the S3.
